 Today I’m sharing this small art journal page that I created with the Gelli Plate over on the Elizabeth Craft Designs blog!
I recently spent a whole day monoprinting at a class taught by Nathalie Kalbach and Birgit Koopsen. It was very inspiring and the idea for this page came from that class.
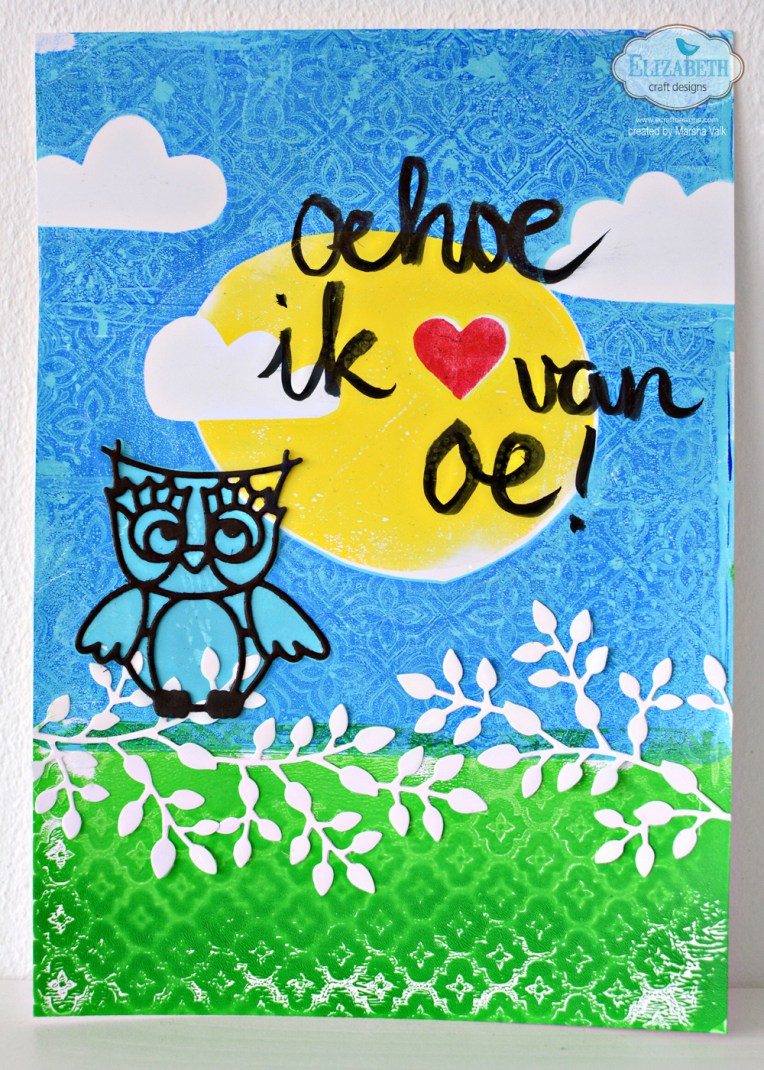
I’ve been wanting to use the sentence on the page ever since I got the owl die. It translates as ‘Hoot, I love you’. It rhymes in Dutch dialect and it happens to be one of those silly things my husband and I say to each other at home.
Here are the written steps to create the page:
1. Die cut the shapes you want to use out of paper. I used scissors to cut clouds, but you can of course use the cloud from the All Seasons Tree if you have it.
You can also use a circle die to die cut the sun shape.

2. Take a sheet of paper (mine was A5 size – 8.27 x 5.83 inches) and think about which parts you want to mask off. Use a re-positional adhesive to adhere the die-cut shapes to the paper.
3. Choose a couple of paint colours and start monoprinting. I started with the sun, then the sky, then the grass and I stenciled the heart in last.
4. To create the pattern in the sky and the grass, layer paint onto the Gelli Plate and then use an embossing folder to stamp on the plate.

The embossing folder will take some of the paint off, leaving a beautiful pattern that will transfer onto your paper when you pull your print.
5. Finish the page by adding additional die-cut shapes and a title or sentiment.
I created a video to give you a better idea of how I did it:
Layering like this can be a bit of a puzzle, but don’t let my little mishap stop you from trying this technique! Happy mistakes are just part of the process and most times I end up liking the imperfect prints even better.
I hope you try using your embossing folders with the Gelli Plate! Have fun creating!
SUPPLIES:
Elizabeth Craft Designs:
E111 Flower Mosaic
E116 Mini Mosaic
794 Heart with Wings
1032 Owl
1033 Leafy Branch
Other:
Paper (A5 size)
Gelli Plate (6 x 6 inches)
Acrylic paint (Liquitex Soft Body Acrylic – Cadmium Yellow Light Hue, Light Blue Permanent, Light Green Permanent, Naphtol Crimson, Ultramarine Blue (Green Shade)
Brayer
Brush pen (black)
Adhesive (I used re-positional and permanent dot runners)
Baby wipes
wat een leuke tutorial Marsha……ga ik zeker ook eens doen!